Showing posts with label Creating a distressed surface. Show all posts

Monday

Elegance and Simplicity


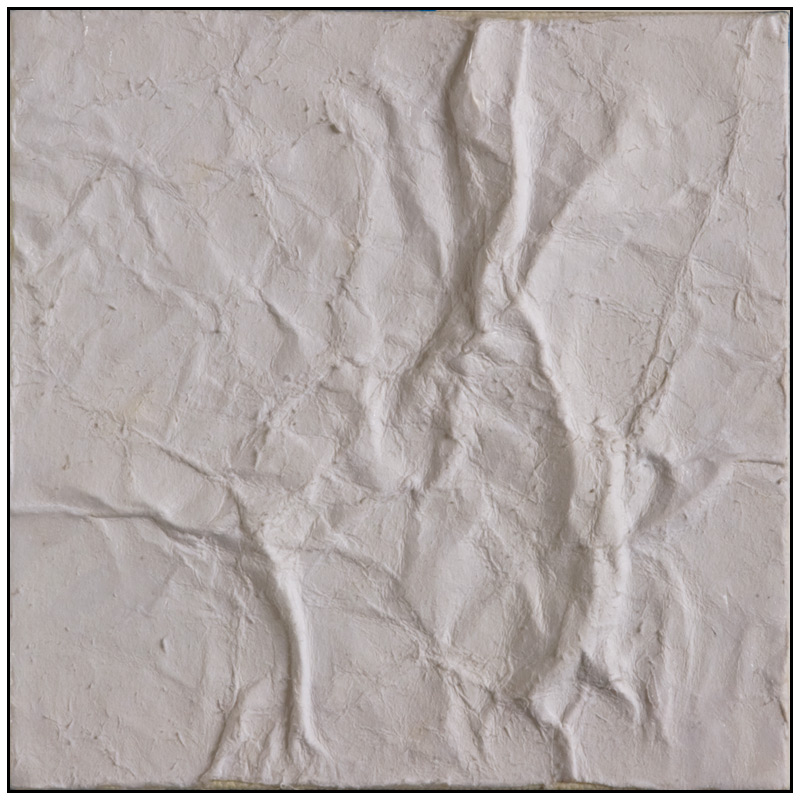
In my last post I shared with you the development of a textured surface made created from paper that would be painted using acrylic and/or oils and now I would like to provide some samples of 5 x 5 inch study paintings in which you can see the results that can achieved.

All the paintings in this post, I used acrylic paints, except for one, were I used spray paint on a portion of the canvas. Some of the canvases had a portion of there surface area painted not with a brush, but applying a technique used by etchers preparing their plates for printing, by wiping off the ink, including using either a cloth or paper towel to remove some paint, only to use it also like a rubber stamp. This allows for the paint that was removed to be transferred back in a different area and by only covering the top surface, it leaves the crevasses untouched.


We can faintly see this method of transfer of off-white paint having been used on the larger area of the canvas to finish the painting. While a more dramatic effects are aimed for in the next sample by using brush and the etching method of cleaning ones plate.


The etcher’s method is when one uses either the edge of ones palm to wipe the surface of the copper plate and remove the excess ink. By using the side palm of ones hand, paper towel or a piece of soft cloths shaped in a ball and then carefully wiping the surface of the canvas and removing the wet acrylic paint so that it only portions remains in the crevasses of the papers textures. This can be clearly seen in the image above, were multiple colors remain scattered randomly about, building numerous layers of color amidst the texture.


The following painting uses a number of different combinations. First the right portion is sealed with painters tape so that I can brush the color yellow, followed by orange that is wiped off. However next I add a little orange acrylic directly to a ball of cloth and then with the same motion of removing paint from the surface, I am now striking the raised ridges of the paper texture and leaving behind concentrated amounts of random color.

Ones this portion of the painting is completely dried—I usually wait a full day—this area is taped off to protect the surface from the other area being worked.

Now instead of using brush or cloth subtract or transfer method, I employ spray paint, containing a fine texture to emulate a particular surface of stone. It was first given a light pass before a second one to firmly cover the area evenly with paint and texture.


Study for Elegance and Simplicity


Upon the completion of this study, I fell in love with the limited color selection and how the paper’s texture reacted to it that I would have to attempt a larger size painting. Doing so would also reveal how the idea on a much smaller canvas translates to a larger medium size one.


Elegance and Simplicity, close-up


On a technical note, the upper left area was first worked, meaning that the rest of the canvas was covered to protect the area. Instead of painting the exposed section, I applied some paint to the cloth and using the etcher’s method in reverse by applying the paint. However at the same time I also wiped the section clean. 

Using this technique, permitted me to color softy the paper, while at the same time leaving ample amount of paint against the raised ridges of the papers texture. This process was repeated several times until the desired visual effect was achieved.


Elegance and Simplicity, MM/C


After a few days the section just completed was covered and work on the opposite side began. One would think it were easier since it was black, but after three coats of acrylic paint, there was enough variation to balance the two sections.

The last area to be painted was the grey. This area too required several coats of paint before evenness and the loss of paint brush tracks disappeared. Several weeks later the painted was sealed with a matt varnish.

In the end, this painting was presented to my son for his twenty-third birthday.


Thank you for your visit
and comment . . .

Egmont


What is new for 2012


It seems my creativity has taken a long silent absence, in part due to the holidays, but now that they it is over with the year end celebrations, it is time to go back to work.


This is where I left off just before Thanksgiving —
Third 20 x 20 inch unpainted canvas in a new series for 2012


Every artist seeks to define themselves through style and materials employed in their work and I am no different and while the last six years has produced a major body of photographic work being Typography Graveyard, I had been experimenting with different materials for painting. The main material source being modeling paste and paper, specifically newsprint, in order to create a distressed surfaces to paint on as well as a collage painting, as with Orderly Confusion or Beauty Re-defined.

The second half of last year was mostly spent focusing on developing texture using different kinds of paper since newsprint was limited to just a flat surface, then came a major break through with the painting White on White. This painting used paper grocery bags to achieve the desired texture and recaptured the desire first discovered with Symphony #3 The Nocturnal Suite, a painting that comes to life as the room light changes.

Trying to merge the concept of a canvas changing its appearance without being as overt as with White on White, while also going in two different directions, one that emulates Typography Graveyard, as well as a distinctive new look.

This has me cutting strips of Vellum Bristle drawing paper at different widths and lengths, then soaking it into a bowl of warm water, anywhere from thirty-seconds to two minutes. Once removed, excess water is wiped, then the paper is crumpled to the desired degree of texture before carefully unfolding and laying it out to dry or depending on the desired effect, applied damp to the canvas with medium gel. Just remember, one can also use a spray bottle, applying a fine mist to re-adjust a dried piece of paper into the desired position.

When applying the paper to the canvas, it is possible to blend the edges of the paper with those next to it for a smoother, almost seamless finish as pictured below.


First 20 x 20 inch unpainted canvas in this new series for 2012


After the paper pieces dry on the canvas, one can fill any gaps with regular medium gel or, depending on the desired texture, use heavy medium gel for better transition, since it will be painted over. The image below features more distinctive lines between the pieces, including a more overall rougher appearance, creating more distinctive shadows that will alter the paintings appearance with the changing room light once it is finished and displayed properly.


Second 20 x 20 inch unpainted canvas in this new series for 2012


With another four to five paintings planned, I am searching for ways to make each canvas stand out, while remaining homogenous to the series core and since I wish to build texture on texture. I am looking at including paper with a much rougher texture, one that is also softer and more applicable than the Vellum Bristle. To the rescue, egg container cartons, made from paper pulp.


Egg cartons, flattened and whole


Torn and flatten pieces of egg container cartons with a few pieces 
 that were flattened, soaked and air dried


I also have another piece of pre-formed paper form used in packaging I plan to use, along with purchasing pulp paper from an art store. However one must not forget that when using any wet paper products, they must be allowed to dry before sealing with medium gel, so that deterioration does not occur.

As this series continues, I continue to look at different ways to include other products into the mix of creating texture. Items as modeling paste, heavy medium gel, tissue paper and Golden Artist Colors product, fiber paste. Other items one might consider is crackle paste, fine pumice gel or for a little more texture, I have a collection of additives I have gathered and filtered for size constancy that would be mixed with medium gel before applying to the canvas.

In the coming months I will share with you further results from this series, along with other smaller projects being developed and some of the pieces completed from last year. In the meantime, I wish you all the best, including a creative and productive year.


Thank you for your visit
and comment . . .

Egmont


Tuesday

A leap of faith


Since I finished the painting “White on White”—my last post—more than a month ago, I felt I had only scratched the surface when it came to interpreting Typography Graveyard, a collection of photographs taken over a period of more than five years of the Berkeley telephone poles and the remains of fliers and posters.


Unfinished and in progress, stage 3
8 x 8” inch (20.32 x 20.32 cm) Shopping bags for a base, treated and
sculpted Bristol paper on canvas


So after taking a leap of faith these last weeks, I have set out upon a journey with the idea of creating a collection of paintings that would take my visual interpretation from a photograph to another level and with no less than thirty-five canvases. A huge undertaking even if these canvases are only 5 x 5” inches (12.7 x 12.7 cm), with an additional undisclosed number that are 8 x 8” inch (20.32 x 20.32 cm).


Unfinished and in progress, stage 3
5 x 5” inch (12.7 x 12.7 cm) treated and sculpted Bristol paper on canvas then covered with gesso,
 further adjustments made after adding new pieces of treated Bristol paper


Unfinished and in progress, stage 3
5 x 5” inch (12.7 x 12.7 cm) treated and sculpted Bristol paper on canvas


This undertaking of mine is now in its third week and during this time many technical discovers have been made as I experiment with different kinds of archival art papers, including vintage book pages, something I thought I would never do, since I love books too much to actually be cutting one up. Once the first cut was made, the next several were easier and now I not only have vintage book pages, but also plenty of interesting binding material and fibers for use in another project, with a few ideas already percolating in the back of my mind.


Unfinished and in progress, stage 1
5 x 5” inch (12.7 x 12.7 cm) treated Bristol paper on canvas


With each new canvas that is started I take another leap of faith in how I use the materials so that there are plenty of differences and yet enough similarities from one canvas to the next, including going back to those I first considered finished and ready for their last two stages, making further adjustments. 


With the first twelve canvases ready for their last two stages, I have opted to first build the foundation to which all layers are added, this way I can maintain control over quality and the look of the series, which otherwise could be jeopardized. This most likely will take two weeks with an additional three to six weeks for building the layers that will represent the Typography Graveyard, with an equal amount for painting the layers in acrylic and then finishing the painting in oil.


Unfinished and in progress, stage 1
5 x 5” inch (12.7 x 12.7 cm) treated charcoal paper on canvas


This will be only the second time in which I have set out to do a series, the other time was in 2000 and took eighteen months, over seven hundred sketches to complete 8 (?) 36 x 36” inch paintings based on Russian Reconstructivism and German Bauhaus.


Unfinished and in progress, stage 1
5 x 5” inch (12.7 x 12.7 cm) various art papers and vintage book text on canvas


Unfinished and in progress, stage 1
5 x 5” inch (12.7 x 12.7 cm) various art papers and vintage book text on canvas


So please join me over the next couple of months as I will sharing more photographs documenting the progress of these small paintings from the layering stages throughout the painting phase.


Thank you for your visit
and comment . . .
Egmont

Saturday

The making of “White on White”


A little over two weeks ago I pulled a canvas from storage and started my first painting in twenty-one months. My inspiration came from the Berkeley telephone poles I had been covering for more than five years in a series named “Typography Graveyard.”


The canvas was first covered with grocery shopping bag paper because of its strength, secured with medium gel, then a second layer of paper was applied. This application served to recreate the three-dimensional shapes that were captured in my photographs. Afterwards when the entire area was given another application of medium gel before everything was covered with gesso, including the underside of the exposed paper forms.


Now with the canvas surface prepared and ready for paint, the area was painted with three different shades of white acrylic paint, followed by one more application of acrylic colours so that I had the colourations I was after. A few days later it would receive a layer of oil paint, mixed with a high percentage of Winsor & Newton’s Liquin; this would function as a glaze and allow some of the acrylic painting to blend through, for a richer but still subtle colour range.


One of the features in this painting is how changing light within room affect the paintings surface. The many shadows that seem to come to life and chance the paintings appearance throughout the day. It is this added—not noticeable at first—nuance that turns a minimalistic painting into a contradiction of riches.


Stage one: covering the canvas with a layer of paper


Stage one: completed


Stage two, partial completion of the texture layer


Stage two: completed


Stage two: completed


Stage three: application of gesso


Stage three: me applying the gesso


Stage three: completed


Stage three: completed application of gesso


Stage four and five: completed application of two layers of acrylic paint.
What follows is stage six: a glazing with oil paints.


“White on White”
MM-O/C 36x48” (91.44 x 121.92 cm) 


Thank you for your visit
and comment . . .

Egmont


I am finally painting again


Earlier this month we had record high temperatures as if it were mid-August, now it has been raining most of the week and by tomorrow the temperatures are to drop so low that if the rain continues, we are expecting the possible of snow in the lower elevations. The last time the Bay Area had any snow was in 1976, however I was in Europe at the time and therefore have no recollection of the event. 


Right now I welcome the rain as there is nothing better to do than to paint, continuing the work I started about a week ago on my first painting in more than a year ago. in the meantime I look forward to the possibility of a little snow.


After applying the sculptured material to the canvas, it was time to prepare the entire surface for painting by applying gesso. Doing so with a brush which which I will be painting in Acrylic and then using oils, helps me to contact mow directly with the surface and get a feel for the type of brush work I will need to apply for the desired effect.


It will be at least another two weeks before I may consider the painting finished, in part because white always takes longer to dry and the weather is not helping in that department. Besides, the process of painting needs to evolve, were the artist connects with the painting and vise versa. 


Upon the completion of the painting I will share with you the entire evolution and process, along with plenty of photographs that have documented the process through the various stages. So stay tuned.


Thank you for your visit and comment,
Egmont


Split decision


In the midst of our journey through the winter season, I begin my exit, leaving behind but not forgetting the last couple of months of contemplation and melancholy, when I begin to think about creating art. With the last coat of satin varnish having been applied, I am ready to share a painting, whose canvas surface first underwent distressing.


When I first wrote about applying newsprint to a canvas and then distressing the surface, I had yet to finish such a painting, even though I had proceeded to work on a smaller canvas with a drawing, then painting a winter squash. It remains unfinished because I still need to resolve a visual problem before proceeding.


Untitled
Unfinished, 12 x 12” (30.48 x 30.48 cm)


For a little more than two months the desire to paint has stirred deep within, however too many distractions cautioned me to curb those urges. However, a couple of weeks ago I was visiting my friend Ian’s blog Abstract Minimalism, it became even more difficult to resist those urges to paint. Ian had just posted Fired Earth, an acrylic multi-medium painting on newsprint. As I left a comment, I noted, “. . . where is the text of the newsprint?” When the comment was left on his blog, I was seeing his painting as if I had painted it and not Ian. I returned a few hours later and correcting my observations with a follow-up comment.


Fired Earth
Ian Foster, mixed medium, 24 x 24” (60.96 x 60.96 cm) 2010


If it were my painting, I would have revealed the newsprint and with that said, I could no longer curb those urges not to paint. On January 30, a canvas was pulled from storage, one already with five layers of gesso and sides covered with painter’s masking tape.


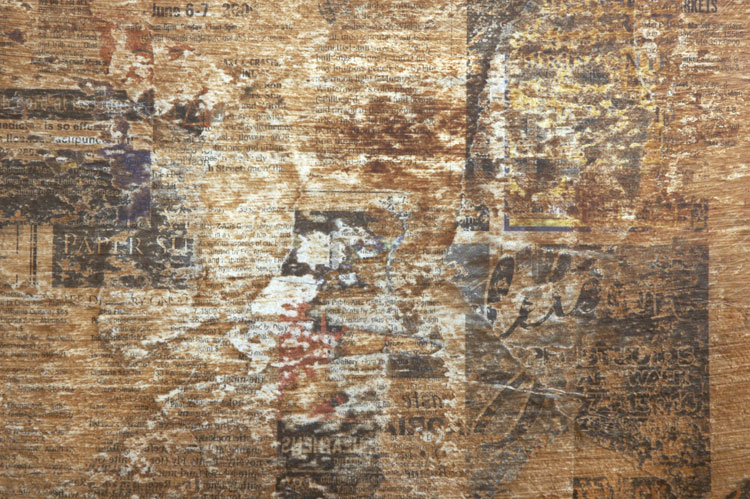
The canvas was covered with several layers of carefully selected pieces of newsprint, secured with medium gel and once completely dried, was sanded to achieve specific effects of distressing and blending of the images and type. This process was repeated an additional three times and between the layers, only portions of the surface was covered with new pieces of newsprint and then sanded, leaving selected sections untouched. Once the last layer was applied, the entire canvas surface was lightly sanded using a 150 grit sandpaper before being temporarily sealed with medium gel.


Close-up of the finished newsprint layer


During the process of applying the newsprint, several ideas were going through my mind; in the end it was important to keep it simple, minimalist but complex. This contradiction would be achieved by selecting only two colours, Burnt Umber and deep Cadmium Yellow, and then applied in multiple layers through glazing, thereby achieving a rich depth.


After two layers of glazing


Because the newsprint was sealed, it now needed to be lightly sanded in order for the paint to adhere. Using painter’s masking tape to seal off the area that was to later receive the deep Cadmium Yellow, the first layer of Burnt Umber was then applied. It was a mixed with glazing medium and a little bit of water and brushed on evenly, using a one and a half inch glazing brush. Because I was now using acrylic paints and not oils with Liquin, I was able to apply a second coat a few hours later that first day.


Close-up of the sanded area after the first two layers of glazing


The following day I tried something new, I began sanding a portion of the painted area, removing some of the Burnt Sienna and revealing more of the newsprint, rather then having the entire area evenly covered with paint. Doing so would allow sections of the finished painting to show more of the newsprint than in other areas of canvas. After adding coats four and five glaze, I repeated the lightly sanding the previous same area, while expanding into another section of the canvas for a little variety. With no further sanding to the Burnt Umber, another ten layers were applied over the next two days, allowing about two hours of drying time between each coating.


After four layers of glaze


Though I consider myself a methodical thinking painter, working out as many issues mentally in advance before starting to paint, I continued to analyze the process after each application of a glaze in order to adjust any technical aspects or even shift the initial direction the paintings outcome.


After the initial fourth application of glaze, I decided to adjust the mixture of the medium by omitting water from the combination. The water had caused the colour to dilute, something I did not want. I decided to use pouring medium, which kept the colours tone intact, but increased fluidness. This brought about a considerable shift in the colours depth and finally produced the results I had initially wanted.


After fourteen layers of glaze and a satin finish


Because of the heavy coat of satin varnish, I felt it best to let the painting dry for two days, since I would need to use painter’s tape to seal of portions of the area in order to obtain a perfect straight line where the two colours merged.


When I applied the mixture of deep Cadmium Yellow with the same approximate ratios of paint, glazing medium and pouring medium, the depth of the Cadmium Yellow seemed to evaporate. It was not until about seven coats that I was beginning to achieve some depth of colour. Adding more paint would only cause the translucency to become clouded, so I simply continued applying more layers after each one had dried for two hours.


After fifteen layers of cadmium yellow deep glaze


With fifteen layers of glaze, I decided that a little more drastic measures were needed in order to have a little more depth to the colour. The decision was that the final two coats of deep Cadmium Yellow would have the equivalent value of 6 layers each, meaning they were poured on as to be having the colour applied with a brush.


A larger quantity was mixed and poured onto the surface with little intervention of a brush, other than to help evenly spread the mixture. This had a more than pleasing appearance I had not anticipated, it produced a surface effect one sees on the hood of a brand new car. The depth, shine, and high gloss dominated the painting in contrast to the larger section with a satin finish and darker colour.
I never thought of having one section of a geometrical abstract painting be gloss and another part with a satin finish, but seeing the interaction between the two and the visual effect it generated, it is an idea I plan to include as part of the composition in a future painting.


Split decision
Acrylic on newsprint/canvas, 20 x24” (50.80 x 60.96 cm) February 8, 2010


As I bring this posting to a close, I regret to inform you that my on-line activities will be significantly be curtailed for the next unforeseeable future, because my Macintosh laptop has broken down. It has served with valor and distinction for many years.

Though it was repaired thirteen months ago, I cannot justify the expense of another repair or the purchase of a replacement, considering my jobless situation.

I hope that you my dear follower will understand when my visit to your site are not as frequent as I would like them to be.

Egmont


Sunday

Painting 101: Creating a distressed background — part three


The work progresses with my usual slow steadiness, methodically analyzing a variety of possibilities and after careful consideration, cautiously progressing to stage three. The canvases have started to reveal a direction in which each one desires to be taken and what is to happen next. From this point on, no canvas will receive the same treatment, especially the 16 x 16 inch canvas, since it saw only one new addition, a single tree. An image I immediately fell in love with and when one considers some of the concepts that were being previously contemplated, this illustration of a tree was perfect for a pastoral scene. The use of this print also would mean the canvases fate was being sealed early on and any additional layers of newsprint for a deeper distressed look was no longer possible.

The elements that are retained so far help bring together the direction this painting is heading, not only because of the solitary tree, but also because of the title ‘Pepper Spray Times’ and the word that has been mostly sanded down, but still visible ‘Community’. The placement of these three elements has been most deliberate, allowing for what is to be painted and where to balance out the composition, considering the painting when finished will be placed behind an old wooden window frame.


Untitled
Newsprint on canvas, 16 x 16” (40.64 x 40.64 cm)
Stage 3, layer five of newsprint after sanding

The idea of combining an image with a window frame is nothing new. When visiting Santa Cruz, we stopped in at a local gallery where we saw a photographer using an old window frames to place his photographic images onto the glass of a distressed window. However I did not care for the image to be placed upon the glass, rather I would want it to be behind and not even against the glass, rather give the illusion of looking to the outside onto something of interest.

My first inclination had been to create an abstract but what can a derelict window have in common with an abstract? The two seemed foreign, considering what I desired to visually express. In the end I settled on the idea of a pastoral scene with a songbird resting on a branch, especially after finding a wooden window frame, which had all the right qualities and reflected the passages of time.


Untitled
Newsprint on canvas, 16 x 16” (40.64 x 40.64 cm)
Close Up

Originally I had planned to stain portions of the newsprint surface with Kusmi tea from Kousmichoff to achieve the antique parchment look, but because the newsprint was adhered to the canvas with a thinned solution of medium gel, this was no longer possible. The use of the medium gel had also sealed the surface and though I could sand away the layer with very fine grit sandpaper, I would run the risk of altering the current look. After having achieved the desired distressed effect, I will just have to do without the Kousmichoff stain and so the surface was permanently sealed with gloss medium varnish.


Untitled
Newsprint on canvas, 12 x 12” (30.48 x 30.48 cm)
Stage 3, layers four-five of newsprint after sanding

After sanding the last application of newsprint, the smallest of the three canvases required a specific newsprint that we only receive once a week, when the supermarkets release their grocery advertisements. Since the first layer of newsprint had contained the store header, the direction this canvas would take was set early on.

The week before I had seen a pumpkin patch and the idyllic scene had started to influence my thoughts, but I am keeping my options open. I have considered the possibility of painting a cluster of walnut on a tree or a beautiful Bartlett pear with a touch of autumn colour. But first I will have to add one to two layers of newsprint featuring produce items and only after distressing the new layers could I determining what occurs next.


Untitled
Newsprint on canvas, 12 x 12” (30.48 x 30.48 cm)
Stage 4, layers six of newsprint before sanding

Previously I mentioned one would need to cover the entire surface with gel medium after one had glued into place the desired pieces of newsprint, but as I quickly discovered, this also meant one would have to first remove this layer with coarse sandpaper in order to reach the newsprint one was trying to distress and blend. Therefore the recommendation was to thin the gel medium with water so that it would still have ample adherence strength, but one would gain greater control in the sanding process.

After a selection of carefully chosen new images of seasonal produce which were cut to size and temporarily placed on the canvas to make sure the items would enhance the over all composition and appearance of the canvas. For it was important to distribute not only the right image but also a bit of colour.

When it became time to glue down the pieces of newsprint, I noted that by giving the paper a slight mist of water on its backside had added in the adhesion process. The paper became also more delicate to handle and if not careful could rip, however this could be turned into an advantage as another way to distress. Remember different grades of sandpaper is not your only option of distressing, using a small sponge, ones finger or a small tool to work the paper when it is wet allows for different kinds of damage and sandpaper is really the tool that blends the multiple layers.


Untitled
Newsprint on canvas, 12 x 12” (30.48 x 30.48 cm)
Stage 4, layers six of newsprint after sanding

Though sanding is a key component in the distressing process, keep looking for other ways to emulate surfaces you have seen and contemplate how you might go about achieving that particular look. What I am representing here should only be considered a starting point and that you should experiment, beginning with the different kinds of paper materials that are available to us.

There are shopping bag, cardboard boxes, corrugated paper, rice paper, recycled hand made paper, tissue paper made from mulberry fibers, and the list goes on and on. What matters is what you the artist are trying to achieve and express with the finished artwork. What you have so far seen is that each canvas started out the same way but after a few layers, each one began revealing a direction it would like me to venture.


Untitled
Newsprint on canvas with tissue paper, 12 x 12” (30.48 x 30.48 cm)
Stage 5, layer one of tissue paper before sanding

In order to tone down the various grocery newsprint advertisements and still permit it to be part of the painting, I decided to add a single layer of white mulberry tissue paper. This single layer would also provide a unified appearance to the entire surface of the canvas, but after the application of tissue paper had dried, I felt it did not have enough of a transparency that I was after. Therefore I decided to begin sanding the tissue paper with 150 fine grit sandpaper, carefully working the surface as to only reveal the subsurface textures, all the time keeping in mind what I might be painting.


Untitled
Newsprint on canvas with tissue paper, 12 x 12” (30.48 x 30.48 cm)
Stage 5, layer one of tissue paper after sanding

As you can see a compromised transparency was achieved but I also had lost the mulberry fibers that laced the tissue paper throughout and though this unplanned segment ended up being a compromise, I also discovered that tissue paper was far more durable than newsprint. By having sanded the paper considerable down with even pressure, the surface ended up being extremely smooth and because this was a single solid layer of paper, it provided an even surface which also strengthening all the layers beneath it into a solid bond.


Untitled
Newsprint on canvas with tissue paper, 12 x 12” (30.48 x 30.48 cm)
Close-Up

Sanding is only a portion of achieving the desired results that one is after. The selection and placement of the newsprint or different kinds of paper determines the look and direction of your distressed surface. You are ultimately in control of every aspect of the process; so let you imagination take on wings so it may soar.

While being engaged on these three canvases, I also discovered that there is an advantage to working multiple canvases. I was now able to try out different ideas between them and have the results be immediate, with the possibility to having an effect applied to another canvas while the canvas is still at the foundation building stage.


Untitled — in progress
Newsprint on canvas, 20 x 20” (50.80 x 50.80 cm)
Stage 2, layer four-five of newsprint after sanding

As each canvas began revealing a direction, this one was no different. Though it was clear more layers of newsprint were necessary, there were a few areas I felt were finished, particularly the upper right hand area and the large red lettering announcing a ‘sale’. These areas and the portrait of an African American man would need to be protected while working on adding a couple more layers and distressing between each application. We must also not forget that after the new pieces of newsprint had been added and sanded to their desired effect, it needs to be sealed before the next application of newsprint with gloss medium varnish. This would ensure that what had been accomplished previously would not be at risk of being lost while sanding around the area and blending the new layers with the previous one.


Untitled — in progress
Newsprint on canvas, 20 x 20” (50.80 x 50.80 cm)
Close-Up

It is important to keep an open mind and though something is working for you, try finding other ways to accomplish the same thing and see if the results are similar or different, and are the new effects desirable. For example, I was concerned about smaller sections of the canvas, which needed to be protected, but immediately around the area I needed to apply more layers of newsprint for distressing. So I asked myself what can I do to protect this very small section and still have all layers blend naturally with the rest of the canvas.


Untitled — in progress
Newsprint on canvas, 20 x 20” (50.80 x 50.80 cm)
Stage 3, layer six-seven of newsprint before sanding

What I tried was using two different pieces of newsprint, both cut to the same size and after gluing down the first pieces the other newsprint was also adhered immediately afterwards on top of the first. The idea is that once the sanding begins, more pressure would be applied to the area where just beneath was the image one wanted to preserve, thereby removing most of the two layers one had just attached to the canvas.

By applying moderate to less pressure on the remaining area of the two pieces of newsprint, varying degree of layered distressing is achieved and allowed to carefully blend in with the surrounding pieces. This is a critical point, making sure that regardless of the layer one is working on, to make sure each additional piece of paper is carefully blended in with the previously layer for a seamless appearance.


Untitled — in progress
Newsprint on canvas, 20 x 20” (50.80 x 50.80 cm)
Stage 3, layer six-seven of newsprint after sanding

Even though I consider this canvas ready for painting, there has been a debate with myself over the addition of one single, large piece of newsprint that would be lightly distressed and afterwards the canvas would be considered finished. It would be simply a collage with no further additions or manipulations, but for now I will sink into the multiple layers and extract segments, creating another level of view.

The photographs I will share in another posting, are to be a visual essay, taking you on a journey within the distressed collage and the many facets that are pieced together as a puzzle into one image. It is then we will learn this canvases final outcome.